
Your account must have a verified domain in order to set up and enable SSO. Review this article for instructions on verifying your domain. Review this article for instructions on verifying your domain.
Step 1: Create a new application on Entra ID
-
Log in to the Microsoft Azure Portal
-
Go to Microsoft Entra ID
-
Navigate to Enterprise applications > All applications
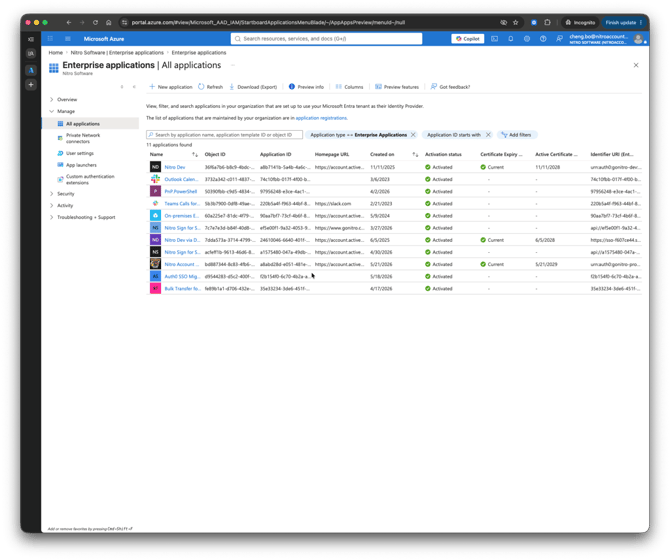
-
In the new page, select Create your own application
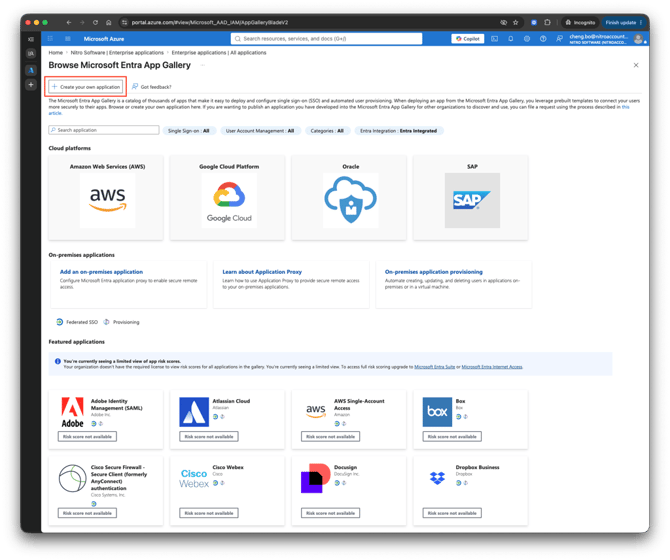
-
Type in name Nitro, select Integrate any application you don't find in the gallery and click Create (no template chosen)
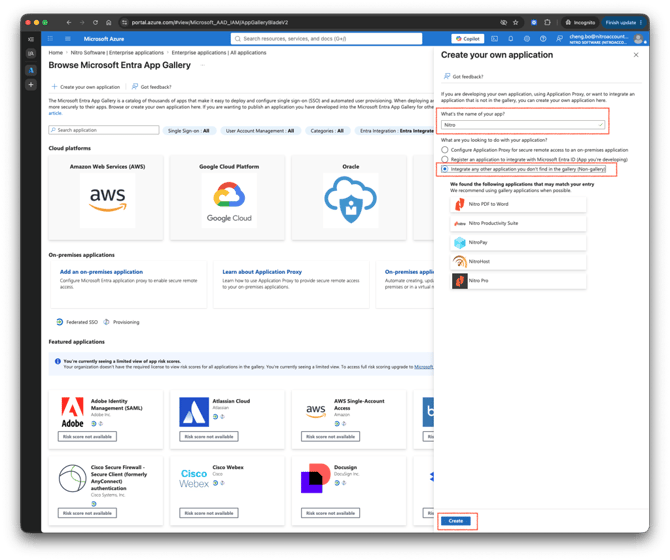
-
Navigate to SAML SSO section on Nitro Productivity Pro
-
Enter the following placeholder values:
-
SAML Entity ID:
urn:auth0:gonitro-prod:123 -
ACS URL:
https://auth.gonitro.com/login/callback?connection=123
These will be updated later in Step 3.
-
-
-
Download the Base 64 Cert from Box 3
-
Copy Login URL from Box 4
Step 2: Set Up SAML SSO in the Nitro Admin Portal
-
Log in to the Nitro Admin Portal
-
From the left navigation pane, go to Settings, then navigate to the Single Sign-On tab
-
Click the Edit Configuration button
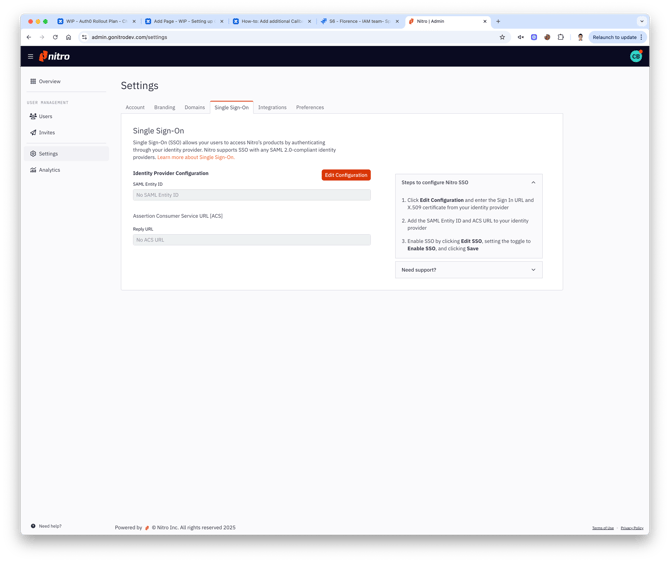
-
Paste the Login URL copied from Entra into the Sign-in URL field
-
Upload the Base 64 Cert downloaded from Entra into the X.509 Signing Certificate field
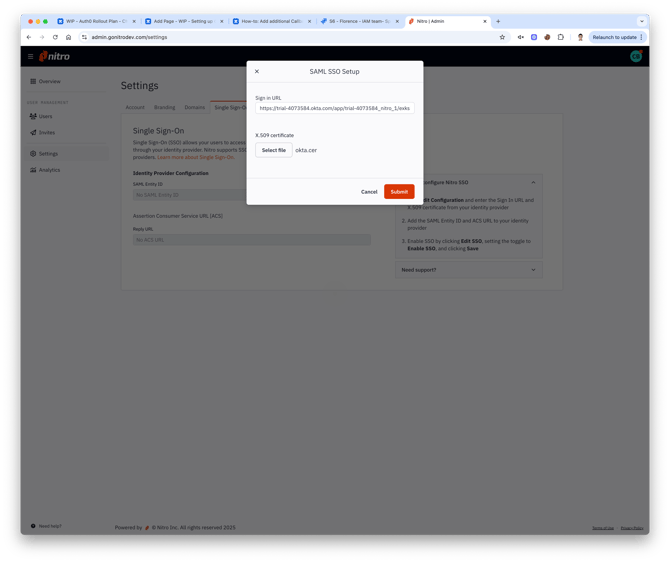
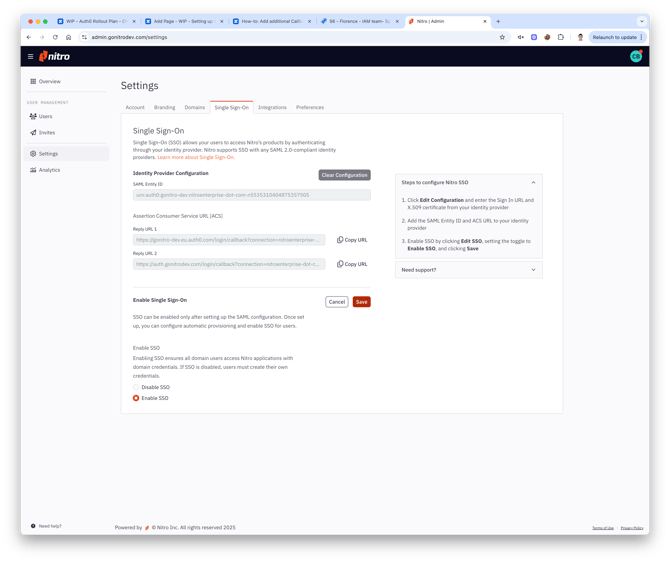
- Click Submit and Enable SSO, then click Save
-
Copy the following values for use in the next step:
-
Entity ID
-
Reply URL 1
-
Reply URL 2
-
Step 3: Update SAML Settings in Entra
-
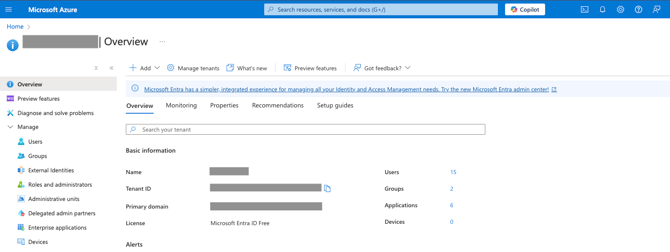
Go back to Microsoft Entra ID
-
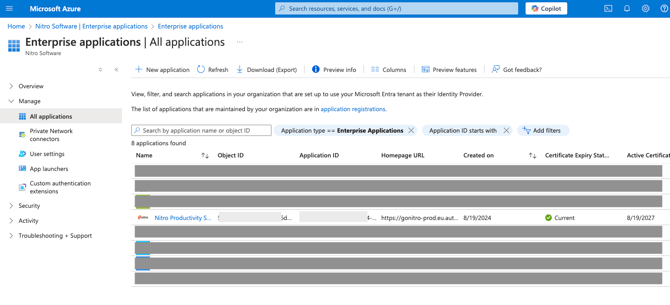
Navigate to Enterprise applications > All applications > Nitro Productivity Suite
-
Under the Manage menu, click Single sign-on
-
Click Edit on Basic SAML Configuration
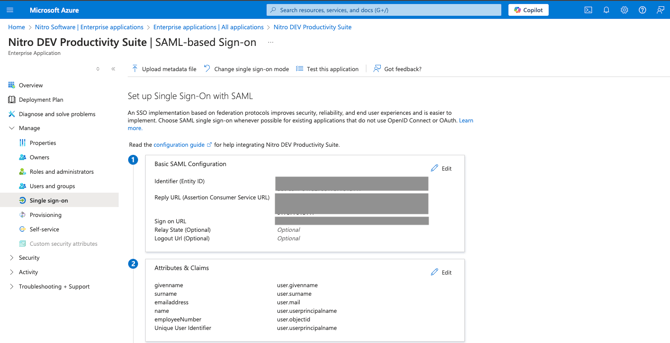
-
Update the placeholder values using the values copied from Nitro Admin:
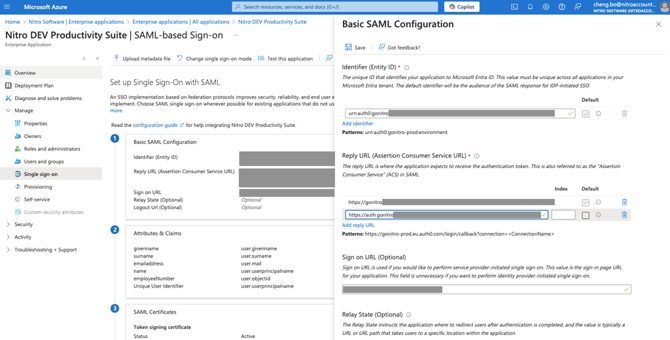
-
Paste SAML Entity ID to Identifier (Entity ID)
-
Paste both Reply URL 1 and Reply URL 2 to under Reply URL (Assertion Consumer Service URL)
-
- Save Changes