To be able to add or remove the Nitro PDF Pro - Microsoft Office add-ins, please follow the steps outlined below:
Method #1
- Launch Nitro PDF Pro and click on the Help ribbon.
- Click the Support Tools button.
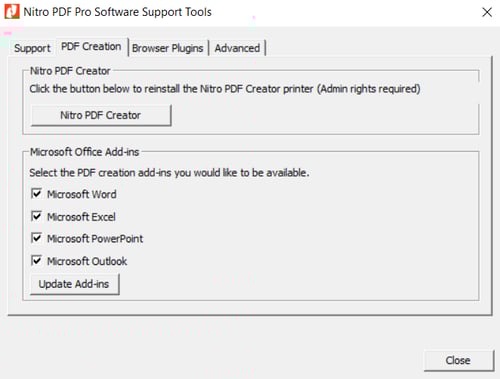
- In the Support Tools dialog, select the PDF Creation tab.
- On this dialog, you can select / deselect the relevant add-ins, then click on the Update Addins button to submit the changes.
Method #2
- Browse to the location where Nitro PDF Pro is installed
By default for V13: C:\Program Files\Nitro\Pro\13
- Locate NitroPDFSupportTools.exe and run this application.
- In the Support Tools dialog, select the PDF Creation tab.
- On this dialog, you can select / deselect the relevant add-ins, then click on the Update Addins button to submit the changes.
NOTE: You will need to restart the relevant Microsoft Office application for the changes made to take place.
For more information regarding how to use Nitro Products, please visit the following website for all our online resources: https://www.gonitro.com/support