This article discusses deploying Nitro PDF Pro for Windows via InTune.
Steps to deploy Nitro using InTune:
A simple factory-defaults installation can be done with InTune if the Nitro PDF Pro MSI already resides on the target computer with the following steps:
-
Provide the directory where the Nitro PDF Pro MSI resides
-
Type the following command into InTune:
-
If using NLS (online account log-in activation): msiexec /I nitro_pro13_x64.msi
-
If using Enterprise (.lic license file) activation: msiexec /I nitro_pro13_x64.msi NPSERIAL=[Enter Licence Serial number here and remove square brackets]
-
Note: the serial number entered above will be the contents of the license file, which will be a 400+ character string.
-
-
Steps to deploy Nitro PDF Pro with an MST file using InTune:
To deploy an .MSI of Nitro PDF Pro along with a Transformation file (.MST), we will need to use a tool developed by Microsoft to prepare the package for deployment.
Pre-requisites:
-
Nitro Pro .msi file and Deployment Utility
-
Win32 Content Prep Tool: GitHub - microsoft/Microsoft-Win32-Content-Prep-Tool: A tool to wrap Win32 App and then it can be uploaded to Intune
-
License method (.lic license file, serial number, or online account-based activation)
Preparing the package:
-
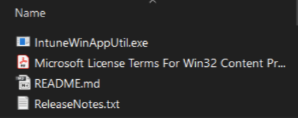
Extract all the contents of the Win32 Content Prep Tool file:
-
Create a new folder, copy and paste the IntuneWinAppUtil.exe inside the folder
-
With the help of the Nitro PDF Pro deployment utility, generate a .mst file.
-
Add both the .MSI and .MST file inside the same folder as the IntuneWinAppUtil.exe
-
Right click inside the folder and select New > Text Document
-
Open the text document and paste the following command (this example is for V13, adjust the installation file as necessary):
msiexec /i %~dp0nitro_pro13_x64.msi TRANSFORMS=?%~dp0nitro_pro13_x64.mst" /qb -
Save the text document as Install.cmd (make sure that the format changes from txt to cmd):

-
Inside the same folder, please copy the .msi file, .mst, IntuneWinAppUtil.exe and install.cmd
-
On the folder path, type CMD to open a CMD window inside that folder
-
Type IntuneWinAppUtil.exe and add the following information:
- Source folder: The folder where all the package files are located.
- Output folder: The folder where the .intunewin wrapper will be created (same as Source Folder):

Configure the Win32 app within Azure Portal:
1 Open Azure Portal and navigate to Intune > Client Apps > Apps which will open Client -> Apps blade.
2 Click Add to open the Add App blade on the Client Apps blade.
3 On theAdd appblade, selectWindows app (Win32) previewto show the configuration options and selectApp package fileto open theApp package fileblade.
4 On the App Package file, select the nitro_pro13_x64.intunewin and click OK.
5 Select App information and provide the application name (Nitro PDF Pro 13), Description (This app installs Nitro PDF Pro 13 activated) Publisher (Nitro Inc.)
6 Back on the Add App blade, select Program, and change the install command to install.cmd
7 Back on the Add App blade, select Requirements, and add the oldest possible build of Windows as the requirements, to avoid any deployment issues.
8 Back on the Add App blade, select Detection Rule to open the Detection Rule blade and select Manually configure detection rules and click Add.
9 Back on the Add App blade, there will be Return Codes this will be pre-populated, and we will run with the default values.
10 Lastly, we need to set the Select groups where one want to assign this app from Add Group blade. There are 3 (three) Assignment types, Select one assignment type. Please deploy MSI applications to some group of devices or users asREQUIRED or Available app.
11 Back on the Add App blade, click Add to finally add the package.
The end-user experience:
-
User receives a notification that changes are required
-
User receives a notification that a download is in progress
-
User receives a notification about a successful installation.
For additional support or to report issues:
-
Submit a Support Ticket here: www.gonitro.com/support/ticket
-
Post on the Community Forum here: Nitro Community Forum